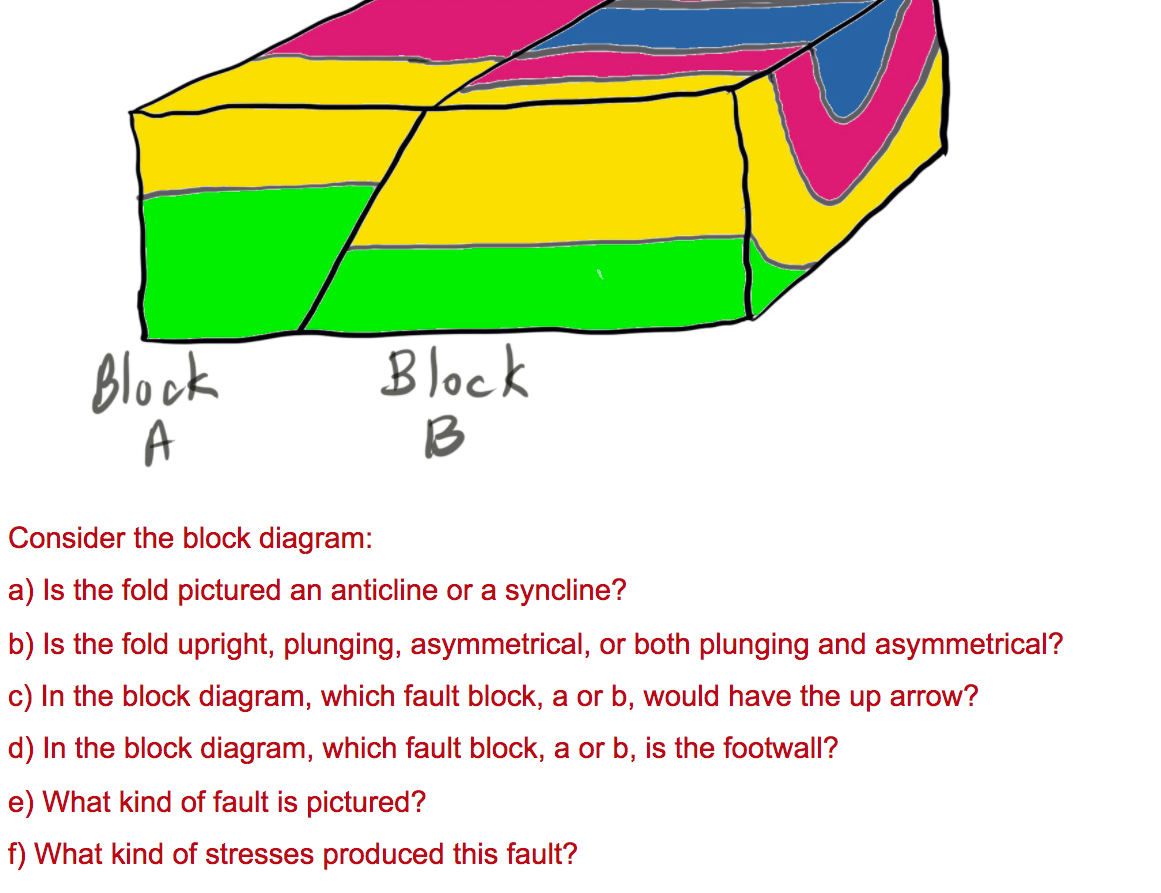
Solved Block A Block B Consider the block diagram: a) Is the
Answer to Solved Block A Block B Consider the block diagram: a) Is the
Solved] . 4.12 For the block diagram shown in figure 4.32b: a. Reduce the
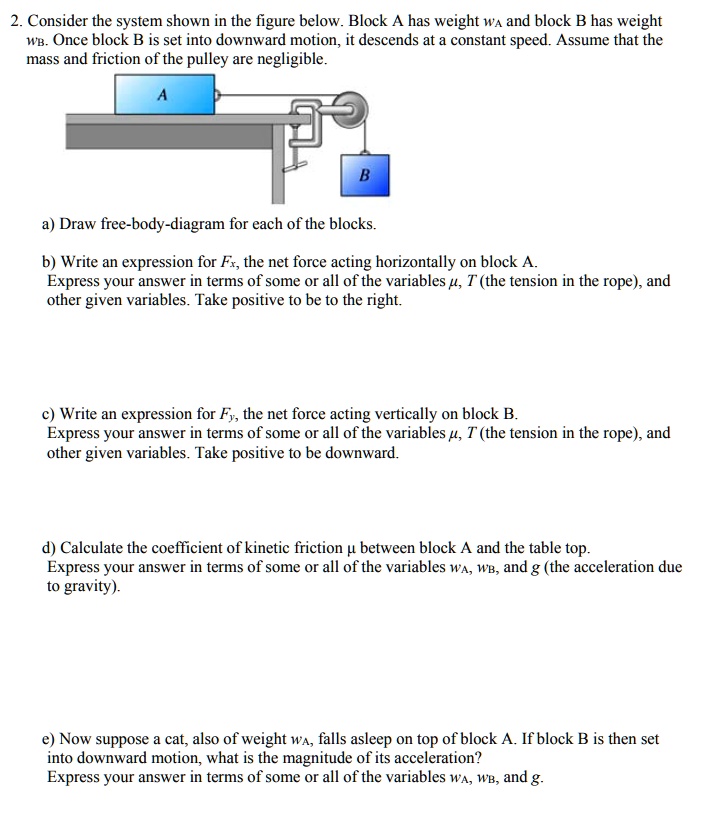
SOLVED: Consider the system shown in the figure below. Block A has weight WA and block B has weight WB. Once block B is set into downward motion, it descends at a
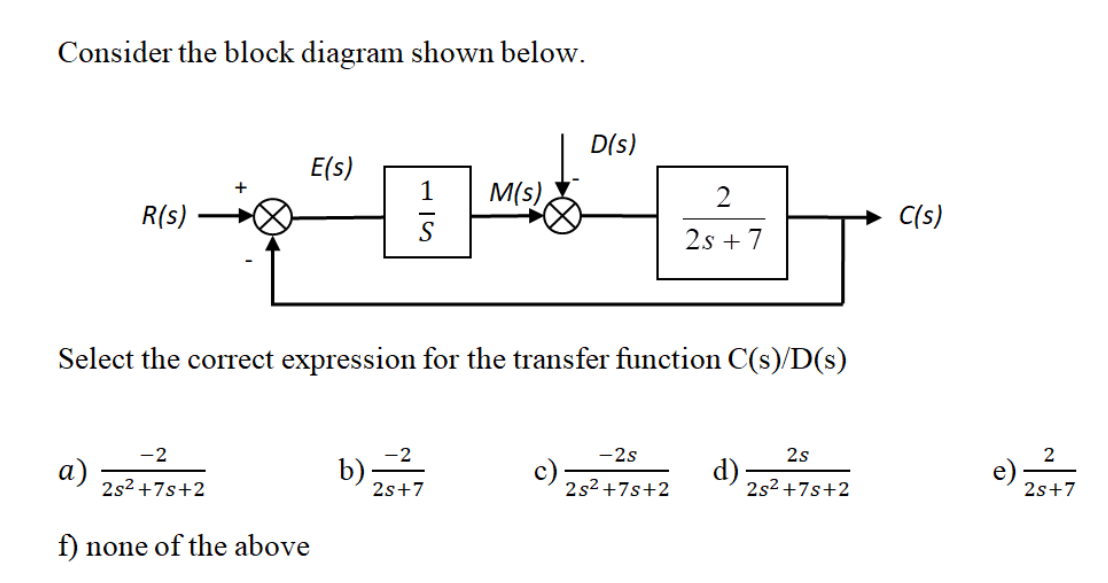
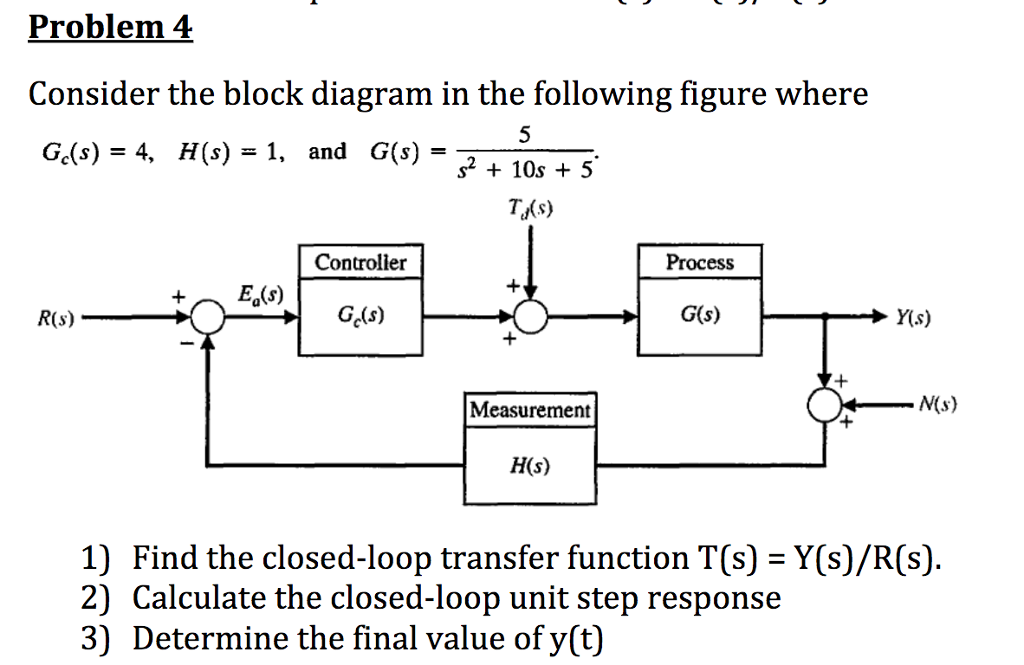
Solved Consider the block diagram shown below. D(s) E(s) 1

Block diagram Algebra Objective Questions - Inst Tools
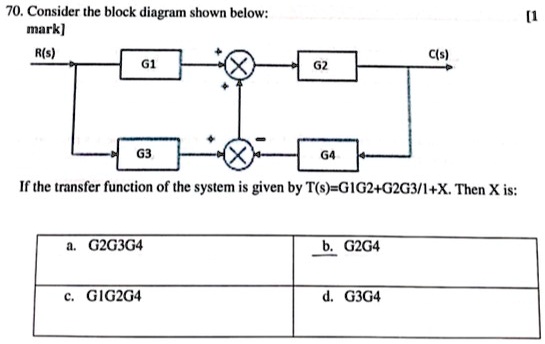
SOLVED: Can someone please solve it step by step? 70. Consider the block diagram shown below: R(s) G1 [1 C(s) G2 G4 If the transfer function of the system is given by
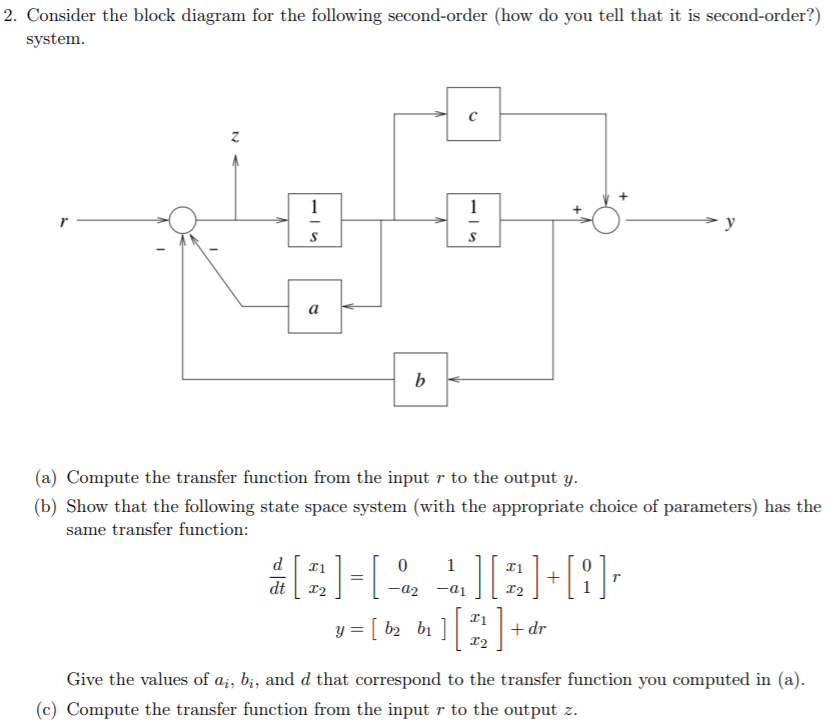
Solved 2. Consider the block diagram for the following
Solved Block A Block B Consider the block diagram: a) Is the
Solved Consider the block diagram in the following figure
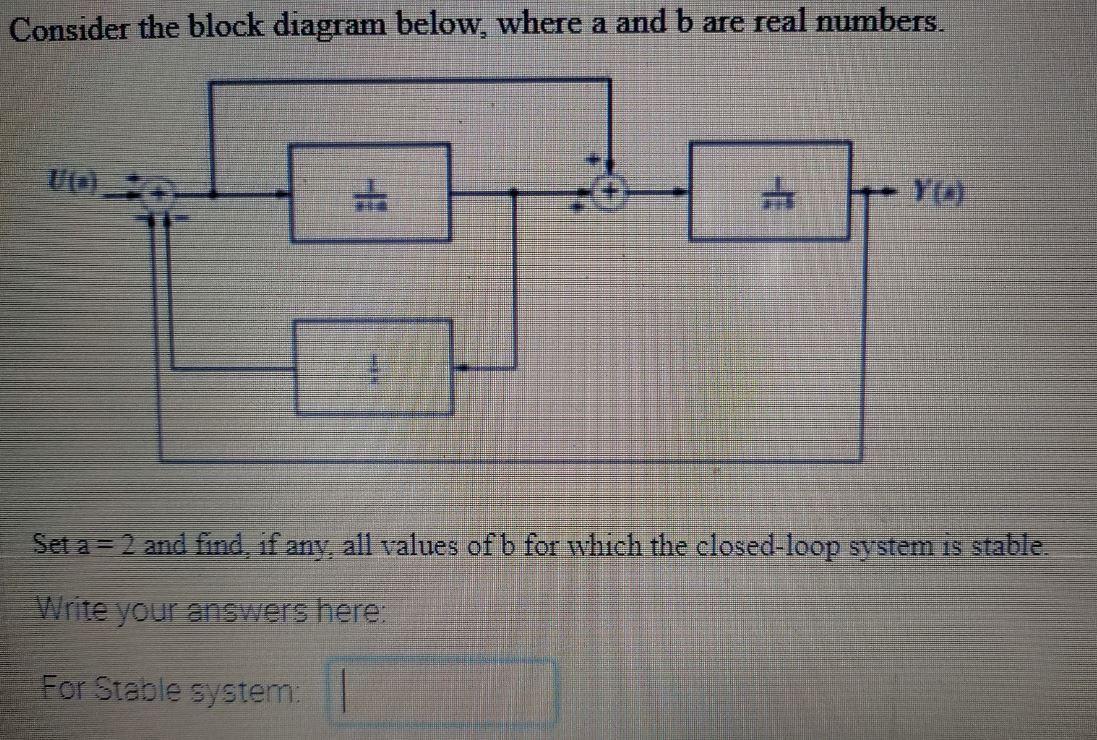
Solved Consider the block diagram below, where a and b are

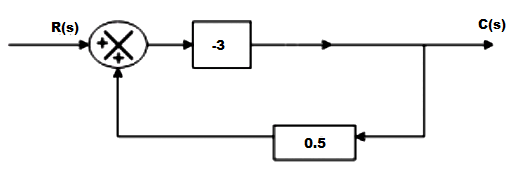
Consider the block diagram shown in figure belowThe value of C(s)/R(s) isa)b)c)d)Correct answer is option 'B'. Can you explain this answer? - EduRev Electrical Engineering (EE) Question
Consider the situation shown in figure. The wall is smooth but the surface of A and B in contact are rough. The friction on B due to A in equilibrium-(a) is upward (
Block diagram Algebra Objective Questions - Inst Tools

Consider a situation of pulling an object with a horizontal forces as shown below: Coefficient of static friction = 0.8 Coefficient of kinetic friction = 0.2 Mass of block = 10.0 kg
Solved] Consider the system shown in the figure.(Figure 1) Block A has a
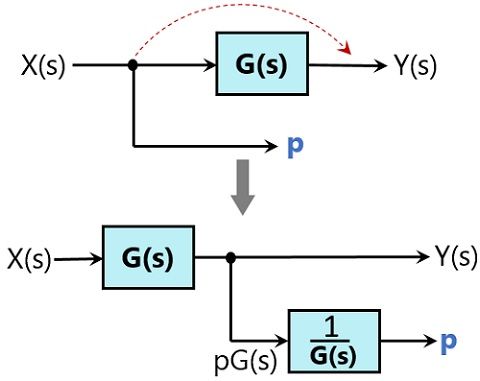
Block Diagram Reduction Rules with Example - Electronics Coach